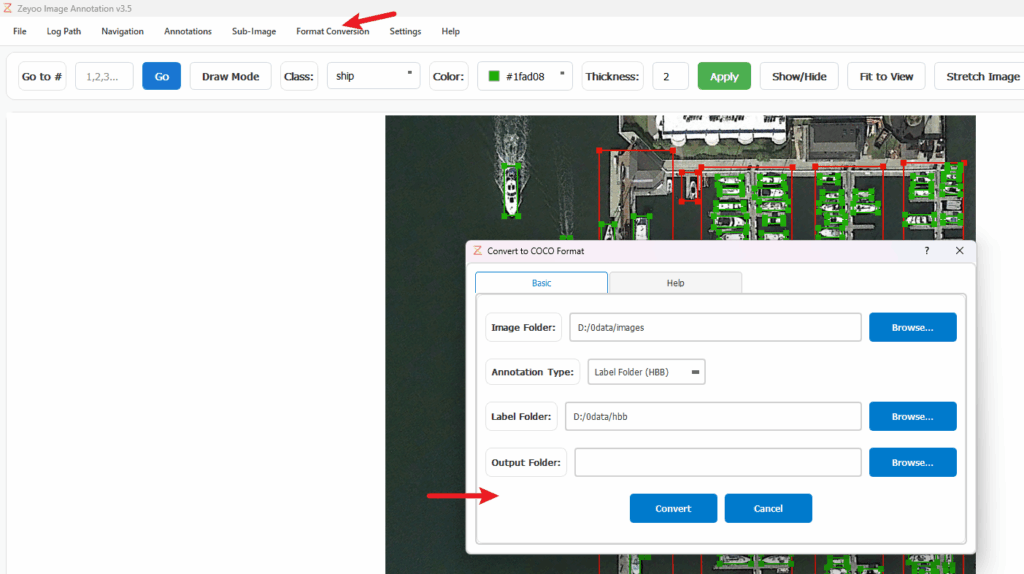
1. Open the software. You can change the theme.

2. Open the image folder. Use Ctrl + mouse wheel to zoom in/out; you can also use the up/down arrow keys to zoom. Hold the mouse to drag the image, or use the WASD keys to move.
Currently supports images with a maximum side length of 10,000 pixels

3. Open the label folder. Input formats can be auto-detected.
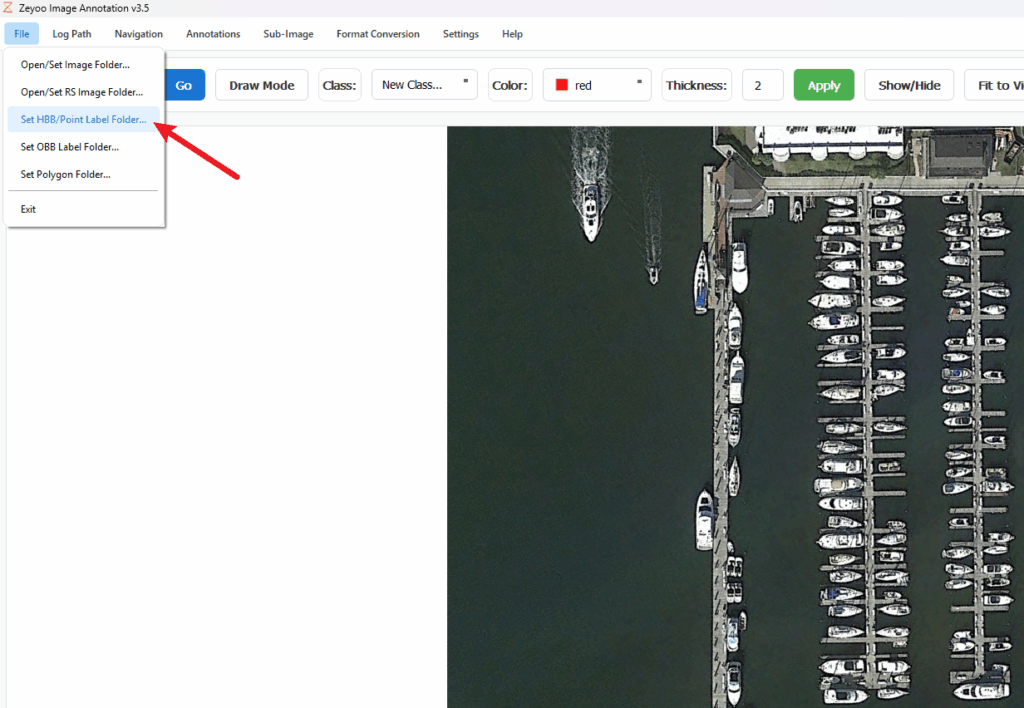
| Type | Supported Input Formats | Default Output Format | Supported Convertible Output Formats |
| Center Point | YOLO | YOLO | YOLO / Esri Shapefile / Image mask |
| Horizontal Bounding Box | YOLO / VOC / COCO | YOLO | YOLO / VOC / COCO / Esri Shapefile / Image mask |
| Oriented Bounding Box | DOTA | DOTA | DOTA / Esri Shapefile / Image mask |
| Polygon | Labelme JSON / COCO / YOLO | Labelme JSON | COCO / YOLO / Esri Shapefile / Image mask |
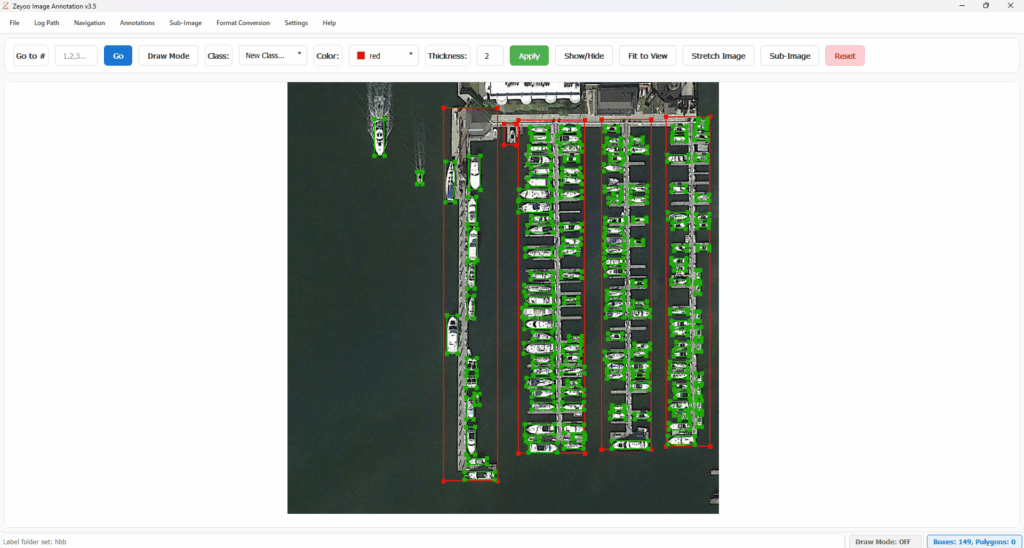
The program assigns random colors to different classes. You can manually set the colors for all categories in the Annotation menu.
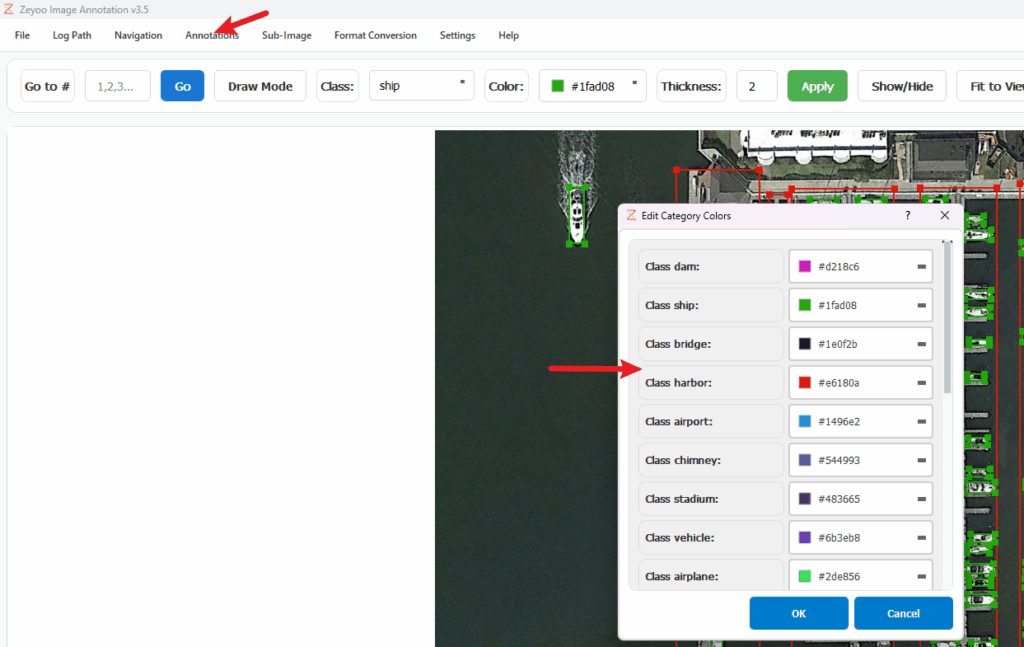
4. Edit or create annotations:
(1) Edit:
Drag the boundary with the mouse, or drag the center of the object to move it entirely.
Double-click the object to display its attributes in the toolbar.
After setting the category and color, click Apply — all objects of this category will be updated.

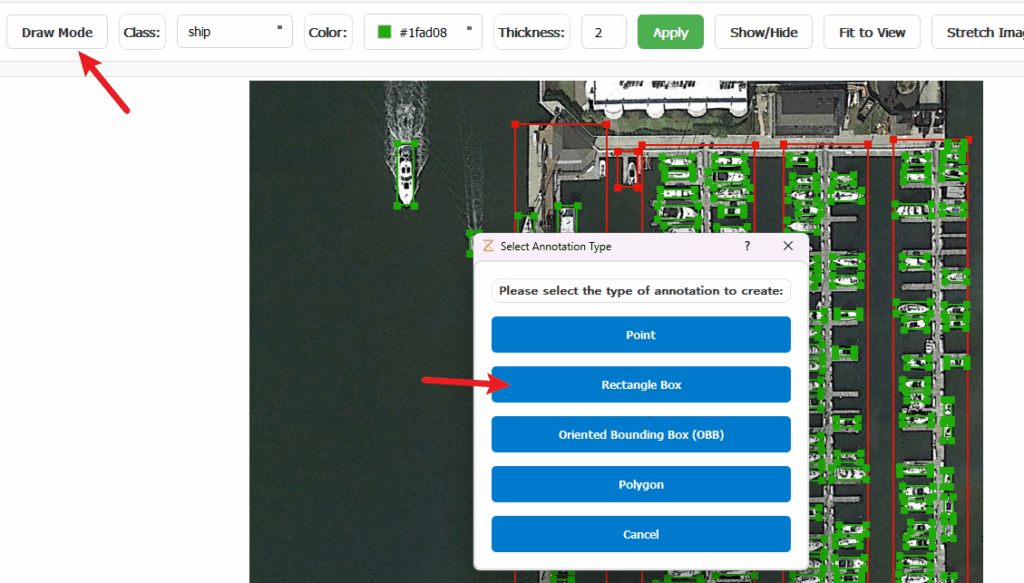
(2) Create: Click Draw Mode (shortcut key, keyboard ‘p’). You will be prompted to choose the annotation type, after which you can create a new category. From the second time onward, the type selection will not appear again; if you need to choose it, go to the Annotation menu and select Reset Type to re-choose.
5. Save: When switching images, annotations are saved automatically. You can also manually save with Ctrl+S.
6. Format conversion: If you do not like the default format, you can manually convert it by selecting the desired format in File Conversion. Export to mask images and Shapefile format is also supported.
