Detailed explanation of deep learning configuration, including historical versions. This article contains many useful links.
1、Install Visual Studio and CUDA
VS is not required, but it is highly recommended to install it.
https://visualstudio.microsoft.com/
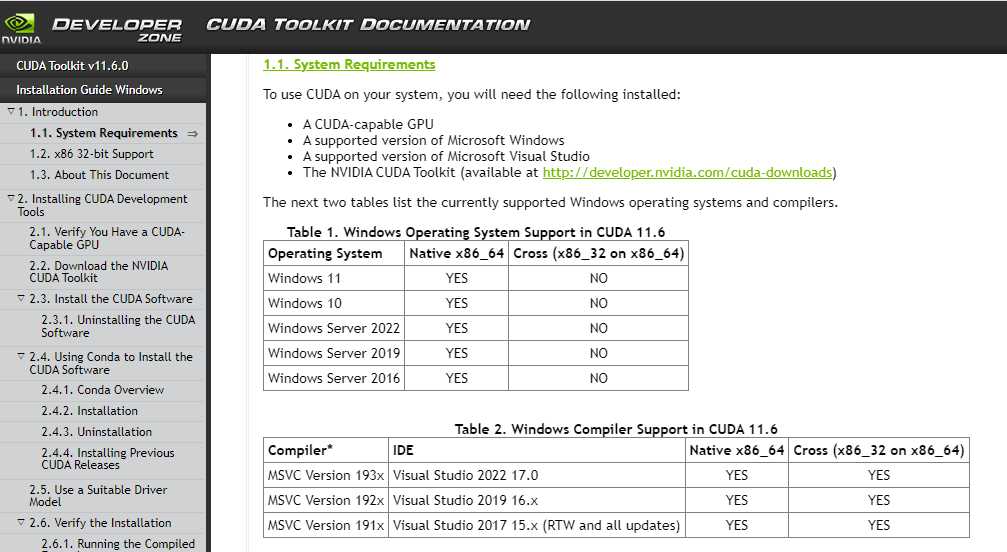
Note: Visual Studio should be installed before installing CUDA, but the choice of Visual Stuido version needs to refer to the CUDA version, so you can first determine the CUDA version from the second point of this tutorial, and then find the corresponding version from the Versioned Online Documentation Visual Studio version (https://developer.nvidia.com/cuda-toolkit-archive).

2、Install CUDA
The download address of each version of cuda: https://developer.nvidia.com/cuda-toolkit-archive
Note: The new version of CUDA can support Windows 11, and some Win 10 versions of CUDA can also run on Windows 11 systems.
To select the appropriate version, it is recommended to refer to:
https://pytorch.org/get-started/locally/(Pytorch)Note that don’t install Pytorch now, this link is a reference when choosing cuda.
https://www.tensorflow.org/install/source_windows(Tensorflow) Note that don’t install tensorflow now.
It is not advisable to choose a too high version.
After the normal installation, there should already be a corresponding path in the computer environment variable, so there is no need to configure it yourself.
3、Install CUDNN
Download address: each version of cuda: https://developer.nvidia.cn/rdp/cudnn-download
You need to register a login account and select the version that matches cuda
After the download is complete, unzip it, and copy all the files (bin, include, lib) in the cuda folder to the cuda installation location, for example:
C:\Program Files\NVIDIA GPU Computing Toolkit\CUDA\v10.1
4、Install Python, it is recommended to use anaconda
Download address::https://www.anaconda.com/products/individual
https://www.anaconda.com/products/individual
The latest version of the official website is not supported by some libraries, so you can download the historical version.
The download address of each version:
https://repo.anaconda.com/archive/
https://mirrors.tuna.tsinghua.edu.cn/anaconda/archive/
Check the path added to environment variables during installation.
Note: Some tutorials will say to create a virtual environment of conda first. It is recommended to consider it according to the actual situation, because it is not necessary. Sometimes it is more convenient to put it in the main environment of the system. In that case, it is not necessary to activate the virtual environment every time. Virtual environments take up some computer space.
5a、Install Pytorch
The latest version of Pytorch::https://pytorch.org/get-started/locally/
Other verisons:https://pytorch.org/get-started/previous-versions/WIN + R
Enter cmd to open the command line and enter the above command code.
5b、Install Tensorflow
WIN + R Enter cmd to open the command line:pip install tensorflow-gpu
specific version:pip install tensorflow-gpu=1.14.1